
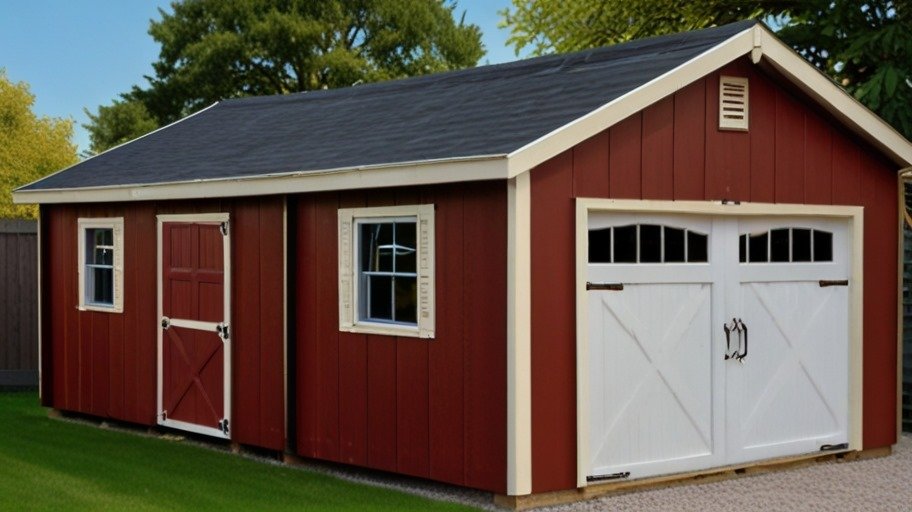
What type of garage door is best for my shed? A 12×20 shed with a garage door is an excellent addition to any property, providing a versatile area that can be used for storage, a workshop, or even a small garage.
This sort of shed gives plenty of space and easy access, making it an excellent choice for a variety of applications.
In this extensive guide, we’ll go over everything you need to know about designing, building, and maintaining your own 12×20 shed.
Planning Your 12×20 Shed with Garage Door
Planning is the first and most important stage in creating a shed. Proper preparation ensures that the project works well and fulfills your expectations.
Importance of Detailed Plans
Complete 12×20 shed plans with garage doors are necessary. These blueprints will assist you in visualizing the job, estimating expenses, and gathering the required components. A good plan has measurements, a materials list, and step-by-step directions.
Choosing Right Design
When selecting a design, consider a 12×20 gambrel shed with garage door plans. The gambrel roof, which is commonly associated with barn-style structures, provides more overhead storage space while maintaining a classic look.
Depending on your preferences and the purpose of the shed, other roof types, such as gable or lean-to, may also be appropriate.
Considerations for Placement
Choosing the correct spot in your backyard is important. To avoid water damage, make sure the location is flat and well-drained.
It is also best to examine local building rules and secure any relevant permissions before beginning construction. Make sure the shed is easily accessible and does not hinder any existing structures or walkways.
Materials and Tools Required
Building a DIY shed with a garage door necessitates a wide range of materials and tools. Here’s a complete list to help you get started.
Materials
- Pressure-treated lumber: Used for the foundation, floor joists, wall studs, and roof trusses.
- Plywood or OSB (Oriented Strand Board): Used for walls, roof decking, and flooring.
- Siding Material: Siding materials include wood, vinyl, and metal.
- Roofing Material: Roofing materials include shingles, metal panels, and other appropriate roofing materials.
- Garage Door and Hardware: Ensure that you select a door size that is appropriate for your design, which is often 8×7 or 9×7 feet.
- Fasteners: Fasteners include nails, screws, and other connections.
- Concrete or Gravel: For the foundation base, use either concrete or gravel.
Tools
- Measuring tape: For precise measurements.
- Circular saw: Used to cut timber and plywood.
- Hammer or nail gun: Used to assemble the frame and secure the siding.
- Level: Ensure that your building is even.
- Drill and bits: Used to make holes and drive screws.
- Ladder: Used to access higher regions during building.
- Safety Stuff: Gloves, goggles, and ear protection are among the safety equipment required.
Purchasing high-quality materials will ensure your shed’s durability and longevity. The majority of these supplies and tools are available at local hardware stores or through online merchants.
Step-by-Step Guide for How to Build a 12×20 Shed with Garage Door
Now that you’ve prepared your designs, supplies, and equipment, it’s time to begin construction. Follow these instructions to build your shed.
Site Preparation and Foundation
Clear the Site: Remove any rubbish and weeds from the area where your shed will be erected. Level the ground.
Lay the Foundation: A sturdy foundation is critical to the stability of your shed. A concrete slab or gravel basis with pressure-treated hardwood skids are also viable options.
For a concrete slab, construct formwork out of timber, pour concrete, and level it. Allow it to heal for a few days before continuing.
Framing the Walls and Roof
Build floor frame: Build the floor framing with pressure-treated timber. Attach it to the base and cover it with plywood or OSB.
Assembling Wall Frames: Build the wall frames on the ground, following your blueprints as a reference.
Include apertures for the garage door and any windows. Raise and fasten the walls to the floor frame.
Install Roof Trusses: Build or purchase roof trusses based on your shed design. Lift and fasten them to the tops of the wall frames. Ensure that they are uniformly spaced and level.
Roof Decking: Cover the roof trusses with plywood or OSB and secure it with nails or screws.
Installing a Garage Door
Prepare the Opening: Make sure the opening for the garage door is appropriately built and strengthened.
Install the Track and Hardware: To install the garage door track and hardware, follow the instructions provided by the manufacturer. This phase may need help owing to the weight and intricacy of the components.
Mounting Garage Door: Carefully raise and position the garage door in the track. Test its functionality to verify that it opens and closes smoothly.
Finishing Touches
Apply Siding: Cover the external walls with your preferred siding material. Ensure that everything is securely sealed and protected.
Install Roofing Material: Attach shingles, metal panels, or other roofing material to the roof decking. Start at the bottom and work your way up to guarantee optimum water discharge.
Paint or Stain: Protect your shed from the weather by painting or staining the external siding.
Add Windows and Doors: Install windows and doors as specified in your drawings. Make sure they are securely sealed to avoid leakage.
Backyard shed with garage door customization may enhance the functionality and aesthetics of your backyard shed.
Insulation and Ventilation
If you intend to use your shed year-round, consider adding insulation to the walls and roof. This will assist in adjusting the temperature and make the environment more pleasant.
To avoid moisture buildup, consider installing ridge vents, gable vents, or even a tiny exhaust fan.
Adding Windows and Skylights
Natural lighting may significantly improve the usability of your shed. Consider installing windows or skylights to bring in sunlight. This is particularly useful if you intend to use the shed as a workshop.
Interior Customization
Customize the inside according to your intended application.
Workshop: Set up workbenches, shelves, and electrical outlets. Make sure you have enough lighting, and consider installing a heater or air conditioner for temperature control.
Storage: Heavy-duty shelves, hooks, and pegboards let you make the most of your self-storage facilities. Create distinct zones for different categories of products to keep everything organized.
Office Space: If you’re turning the shed into a home office, make sure it’s adequately insulated, has comfy flooring, and has enough electrical outlets and internet access.
Cost and Maintenance
Building a 12×24 shed with a garage door can cost between $4,000 to $10,000 depending on materials and l12x20 shed with a garage doorabor, requires regular maintenance such as roof inspections, garage door lubrication, and wood treatment to ensure longevity and functionality.
Cost Breakdown
Building a 12×20 shed has numerous costs:
Materials: High-quality materials might cost $2,000 to $6,000.
Labor: Hiring pros might cost an additional $2,000 to $4,000. DIY building can save prices, but it takes time and work.
Permits and Inspections: Depending on your area, permits might cost between $50 and $200.
The entire cost might vary from $4,000 and $10,000, depending on materials, labor, and personalization.
Maintenance Tips
Regular maintenance can keep your shed in good shape.
Roof Maintenance: Check the roof regularly for leaks or broken shingles. Replace any broken components immediately to avoid water damage.
Garage Door Maintenance: Ensure that the garage door runs properly. Oil the moving components and check them for alignment regularly.
Wood Treatment: If your shed is built of wood, treat it with wood preservative once a year to prevent decay and insect damage.
Clean Gutters: If your shed has gutters, clean them regularly to prevent water overflow and damage.
Conclusion
A 12×20 shed with a garage door is a practical and useful addition to any property. Your shed may serve as a practical place for many years if you plan carefully, use high-quality materials, and maintain it properly.
Whether you use it for storage unit, a workshop, or a tiny garage, this shed will give you the space and convenience you want.
Begin designing your project immediately by following Freedomz Storage’s guides and gain numerous benefits from this functional and elegant construction.
FAQ
Q: What are the benefits of a 12×20 shed with a garage door?
A: 12×20 shed with garage door offers ample storage space, easy access for larger items, and versatility for various uses such as a workshop, self-storage units for garden tools, or a small garage for vehicles like motorcycles and ATVs.
Q: How much does it cost to build a 12×20 shed with a garage door?
A: The cost can range from $4,000 to $10,000 depending on the quality of materials, the complexity of the design, and whether you hire professionals or do it yourself. This includes the foundation, framing, roofing, siding, and the garage door.
Q: What materials do I need to build a 12×20 shed with the door?
A: Essential materials include pressure-treated lumber, plywood or OSB, siding material (wood, vinyl, or metal), roofing material (shingles or metal panels), fasteners, and a garage door with hardware. You may also need concrete or gravel for the foundation.
Q: What tools are required for building the shed?
A: Key tools include measuring tape, circular saw, hammer or nail gun, level, drill and bits, ladder, and safety gear (gloves, goggles, and ear protection).